Wrecked

Holding You Back As I Breath You In


  • 首页

  • 关于

  • 标签26

  • 分类15

  • 归档34

  • 搜索

搭建简单的文件下载服务器

发表于 2019-06-18 |

[apache2]

1
2
3
4
5
6
7
8
9
$ root@user: apt-getinstall apache2  //配置文件地址 /etc/apache2/sites-enabled/000-default

$ root@user: cd /var/www/html/ //并在此目录放入要下载的文件

$ root@user: rm -f index.html //删除该文件

$ root@user: curl cip.cc //获取服务器外网IP 通过浏览器访问 如图

$ root@user: /etc/init.d/apache2 restart //重启Apache2 $ root@user: /etc/init.d/apache2 stop //停止Apache2

image

[Nginx]

1
2
3
4
5
6
7
8
9
10
11
12
13
14
15
16
17
18
19
20
21
22
23
24
25
26
27
28
29
30
31
32
33
34
35
36
37
$ root@user: apt-getinstall nginx  //配置文件地址 /etc/nginx/nginx.conf  在nginx.conf末尾有一句:include /etc/nginx/conf.d/*.conf;  推荐把用户自己的配置放到conf.d/

$ root@user: vim /etc/nginx/conf.d/default.conf //添加用户的自定义配置文件
autoindex on;# 显示目录
autoindex_exact_size on;# 显示文件大小
autoindex_localtime on;# 显示文件时间
$ root@user: vim /etc/nginx/nginx.conf //在http 增加以下配置

server {
listen 8080 default_server;
listen [::]:8080 default_server;
server_name _;
root /root/share/; //分项目录

# Load configuration files for the default server block.
include /etc/nginx/default.d/*.conf;

location / {
}

error_page 404 /404.html;
location = /40x.html {
}

error_page 500 502 503 504 /50x.html;
location = /50x.html {
}

}

$ root@user: /etc/init.d/nginx reload 重新加载

$ root@user: curl cip.cc //获取服务器外网IP 通过浏览器访问 如图


错误日志 /var/log/nginx/error.log
访问日志 /var/log/nginx/access.log

image

Mysql 安装

发表于 2019-06-14 | 更新于 2019-09-18 | 分类于 Mysql |

 Mysql安装地址

1
2
3
4
5
6
7
8
9
10
11
12
13
14
15
16
17
18
19
20
21
22
23
24
25
26
27
28
29
30
31
32
33
34
35
36
37
38
39
40
41
42
43
44
//下载mysql-apt-config_0.8.13-1_all.deb 到Linux 
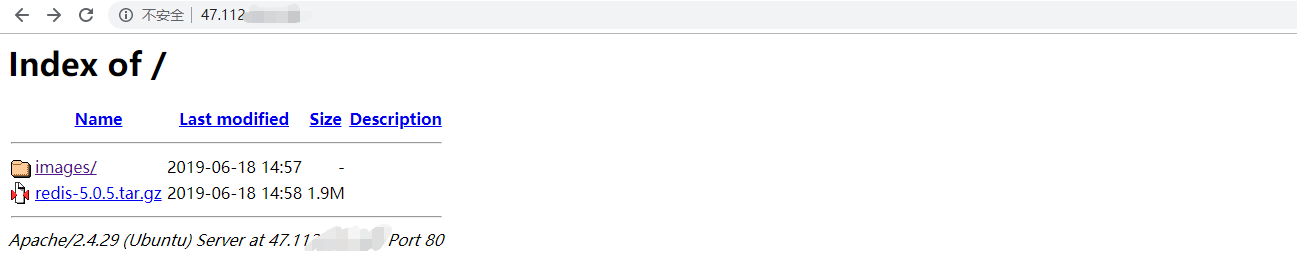
$apt-get update

$mkdir mysql

$cd mysql

//安装
$apt-get install mysql-server

//查看Mysql服务状态
$ service mysql status

//重启Mysql
$service mysql restart

//查看Mysql端口占用
$netstat -tunlp | grep 3306

//进行安装初始化设置密码等操作
$ mysql_secure_installation

//设置 Linux服务器数据库可以在任意服务器上远程连接
$ mysql -u root -p
mysql> show databases;
mysql> use mysql;
mysql> select host, user from user;
mysql> update user set host = '%' where user = 'root';
mysql> flush privileges;
mysql> exit;


从命令行终端运行此命令,将在寻找Linux/BSD / OS X系统中的MySQL配置文件 my.cnf 文件:

mysql --help | grep 'Default options' -A 1
上面命令执行后,会有这样的输出:

Default options are read from the following files in the given order:
/etc/my.cnf /etc/mysql/my.cnf
/usr/local/etc/my.cnf
~/.my.cnf
/etc/mysql/mysql.conf.d mysql配置文件
现在,可以检查你正在使用的 my.cnf 文件是否存在。在 Mac OS X 中默认式没有 my.cnf 文件的。你可以从这个地方复制一份过去 /usr/local/mysql/support-files/my-default.cnf 每个版本都不一样,你只需要找到一个 .cnf

Linux 系统搭建Redis

发表于 2019-06-13 | 分类于 Redis |

Installation

1
2
3
4
5
6
7
8
9
10
11
12
13
14
15
16
17
18
19
20
21
22
23
$ mkdir redis       //创建redis目录

$ wget http://download.redis.io/releases/redis-5.0.5.tar.gz //下载安装包

$ tar xzf redis-5.0.5.tar.gz //解压

$ cd redis-5.0.5 //进入redis-5.0.5目录

$ make //生成有效文件

$ cd src

$ ./redis-server //1.启动redis服务 这种方式启动redis 使用的是默认配置

$ ./redis-cli
redis> set foo bar
OK
redis> get foo
"bar"

$ vim ../redis.conf //编辑Redis配置文件

$ ./redis-server ../redis.conf //2.使用指定配置文件使用下面命令启动
redis 配置文件详解
fields desc
daemonize no 默认情况下,redis不是在后台运行的,如果需要在后台运行,把该项的值更改为yes
port 指定redis运行的端口,默认是6379
bind 指定redis只接收来自于该IP地址的请求,如果不进行设置,那么将处理所有请求,在生产环境中最好设置该项
timeout 设置客户端连接时的超时时间,单位为秒。当客户端在这段时间内没有发出任何指令,那么关闭该连接 0是关闭此设置
loglevel # debu 记录很多信息,用于开发和测试 varbose 有用的信息,不像debug会记录那么多 notice 普通的verbose,常用于生产环境 warning 只有非常重要或者严重的信息会记录到日志
logfile /var/log/redis/redis.log 配置log文件地址 默认值为stdout,标准输出,若后台模式会输出到/dev/null
rdbcompression yes 存储至本地数据库时(持久化到rdb文件)是否压缩数据,默认为yes
dbfilename dump.rdb 本地持久化数据库文件名,默认值为dump.rdb
requirepass foobared 设置客户端连接后进行任何其他指定前需要使用的密码。
save 指定在多长时间内,有多少次更新操作,就将数据同步到数据文件,可以多个条件配合 save 900 1 900秒(15分钟)内有1个更改
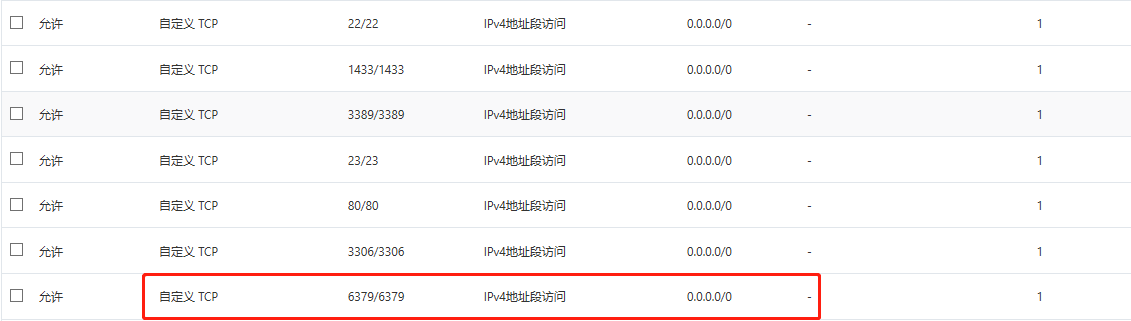
windows Redis Desktop Manager 连接不上Redis的问题
1
2
3
1. ufw status 查看Redis 6379 端口是否开启 未开启则 :ufw allow 6379(Redis默认端口 修改默认端口到redis.conf修改)

2. 云平台安全组是否开启了Redis 6379 端口

 云平台安全组是否开启了Redis端口

1…789…12
Wrecked

Wrecked

34 日志
15 分类
26 标签
RSS
GitHub E-Mail
Links
  • WeChat
  • Java2s
© 2020 本博客所有文章除特别声明外。转载请注明出处!